OSHA’s records show that about 10% of workplace fatalities are from fall-related accidents. Those who don’t die from their fall often experience serious injuries, such as broken bones or head trauma. OSHA’s records also show that nearly all of the fall-related deaths and injuries were preventable.
Three main strategies exist for protecting workers from fall-related injuries:
Hazard elimination. It makes sense that eliminating fall hazards in the first place is the best way to protect people. In many cases, this is up to the worker. For example, you use a pole-mounted tool instead of a ladder. In other cases, this is up to the company; for example, the fall threat is designed out by placing test ports usable at ground level rather than requiring the employee to climb to a measuring point.
Procedure modification. Sometimes, fall protection and/or hazard elimination are impractical or impossible. Maybe you can rethink the work process so those measures become practical. Think a little harder, and you could make those measures unnecessary. For example, a tech climbs up on a machine to take motor vibration readings. You eliminate this task by installing motor vibration sensors (as part of a vibration monitoring system). Another way work procedure modification can help is by changing where the work is done. For example, you assemble the motor control box (drill holes, mount the controller, etc.) in the shop rather than while on the lift.
Fall protection. This breaks down into two major categories: Fall arrest (catch you once you fall) and fall restraint (keep you from falling). Examples of fall restraint include platform railings, tape barriers, and ladder cages. Our focus will be on fall arrest, specifically the harness/lanyard PPE worn while at elevation.
Fall arrest
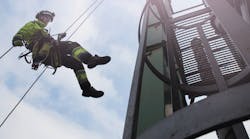
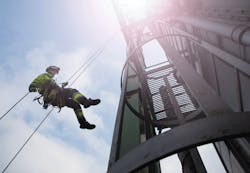
As the name implies, this is equipment that arrests your body once you fall. Typically, this means a harness and lanyard. You clip one end of the lanyard to your harness, and the other end to an anchor point. This system has many points of failure that you must address if you are to be safe while depending on it. Start by examining the work area for anchor points.
Anchor points — Pipes, raceway, and small bracing cannot serve as anchors. Other items commonly misused as anchors include C-clamps, guardrails, ladders, light fixtures, and rebar.
Make a visual examination from the ground to look for the anchor points if possible, rather than climbing up and not finding one where you need it.
An anchor point might be a closed metal or fiberglass hoop provided specifically for that purpose. This system can be enhanced if these anchor points are painted in a contrasting color to the structural members to which they are attached.
There may be suitable anchors that are not specifically designated for that purpose. An example might be the lifting eye on a motor that’s right where you’ll be working. Always verify that any potential anchor can sustain the force required to stop your fall.
To safely move at elevation, you may need to attach to a new anchor before detaching from the one you’re on. This means you need two lanyards.
Once you’ve ascended into the fall protection zone, you’re going to start clipping to anchor points. Examine each anchor point (especially any not specifically installed as fall protection anchors) for cracks, sharp edges, loose bolts, or any other defect. Don’t trust one that looks at all suspicious.
The harness — You’re supposed to inspect your fall arrest PPE before use. To many people, this means glancing at the harness to ensure it isn’t falling apart and doesn’t have obvious damage. But that’s not enough.
First, make sure neither your harness nor your lanyard is past its expiration date. A harness subjected to normal use should be replaced after about five years. Hard use shortens this significantly. What if it’s unused and stored perfectly? Toss the harness after 12 years.
If nobody is keeping track of the age or use of your gear, do you want to risk using it? No, get known good gear instead. A decent harness costs around $50. Replacing all the harnesses and lanyards used by a maintenance department or a construction electrician team costs nothing compared to the medical care cost for one broken femur. It doesn’t make sense to use an old harness to “save money.”
If your harness passes the age test, you still need to physically inspect it. Using your fingers, “walk” the waist band from one end to the other. Look and feel for frayed edges, pulled stitching, or fiber damage. Then walk each leg loop, the connecting straps, and any belay loops or other attachment points. Next, look carefully at any grommets, rivets, buckles, and other hardware; if there’s a problem, trash the PPE. This complete inspection won’t need to be repeated that day, but you should perform it before first use.
Once you put the harness on, have a partner check along with you for the following:
- Belt, straps, and leg loops are not twisted.
- Belt is tightened, leg loops are tightened, buckles are secure. Your open hand should fit between the belt and your body; same for each leg loop and your body.
- If it uses double-back D-rings, they look like a C (because the doubled back portion hides the vertical edge of the D).
Repeat the harness check, with special attention on the buckles, before every ascent even if you don’t remove the harness. This is standard protocol in rock climbing; make sure you follow it in industrial climbing.
The lanyard — Never use a lanyard for other purposes, and never substitute something else for your lanyard.
Each end of the lanyard has a clip for connecting to the climber’s harness or an anchor point. The clip is typically a hook and spring latch system, which is quick and easy to use. If the latch does not firmly make a closed clip, then replace the lanyard. Make sure the clip is large enough for the anchors you have. It’s not meant to be used as an open hook; the latch must completely close when clipped to the anchor point.
Another style is the carabiner clip. It typically has a barrel you twist to open and close the clip eye. If the carabiner doesn’t lock shut, replace the lanyard.
For the middle of the lanyard, perform the same kind of inspection you did with the harness (looking for frayed edges, pulled stitches, or fiber damage).
The (nonretractable) lanyard is short by design. Don’t clip lanyards together to get a longer tether; doing so means much more force at the end of the fall. A short tether means a short fall; the longer the tether, the more you are going to feel that fall arrest when it comes — nor do you want to swing into something, pendulum style.
If your lanyard isn’t long enough for you to work, what should you do? Look for an anchor point that’s closer to the work. If one is not available, the job cannot be done without another anchor point being installed or some method other than a fall arrest system for protection. For example, the solution may involve installing a net that is approved for fall protection. Or perhaps a mechanical lift can be used (and you clip in to an anchor point on the lift).
Some lanyards are retractable. If this is what you have, ensure the rivets are sound and any nut/bolt fasteners are tight. In addition, know how much extension (e.g., 30 ft) it will give, how to control that extension, and where (if anywhere) some extra length might create a safety deficiency.
Reducing falls
PPE is your last line of defense. The main reason people fall is because their center of gravity moves outside their base of support. They lose their balance. This is why people on a ladder fall off when they reach way over to the side (instead of moving the ladder).
If you’re standing on a flat surface, your feet form your base of support. Try putting your feet together and having a friend push you over. Then have your friend try with your feet wide apart. Notice the difference?
You also want to keeping your mass low within your base of support. Repeat the above experiment while standing tall and reaching your hands overhead, then again while crouching low. Vast difference, right? Remember these things when at elevation and your chances of falling plummet, but you don’t.
Lamendola is an electrical consultant located in Merriam, Kan. He can be reached at [email protected].
SIDEBAR: Close Call
In the 1980s, the author, Mark Lamendola, worked on instrumentation on top of 200+ ft refinery towers and survived a fall off one, thanks to fall arrest PPE. In 2000, he started sport climbing, and now climbs nearly every weekend.


