Electrical installations form the backbone of society — powering homes, businesses, and industries with the energy essential for everyday operations. However, working with these systems can be hazardous (and sometimes deadly) when proper safety measures aren’t taken.
There are many dangers involved in electrical installations. Even a small electric shock can disrupt heart rhythms or cause burns. The heat of an arc flash (a sudden release of light and heat from an arc fault explosion) can reach temperatures hotter than the sun's surface, resulting in severe burns, eyesight damage, or death. The resulting arc blast (the pressure wave released after an arc flash) can throw a full-grown human several feet and result in hearing loss. Arc blasts can also throw shrapnel, tools, and other materials into anyone in the blast zone, causing severe injury.
Even the most experienced electricians can make mistakes while rushing to complete a job. Electrical professionals can reduce hazards by taking these nine steps to ensure a safe electrical installation.
1. Safety first
Always wear appropriate personal protective equipment (PPE). Best practices for PPE vary based on the category level and environment of the system being worked on, but some of the most common PPE include:
- Insulated gloves
- Safety shoes with non-conductive soles
- Goggles or safety glasses with side eye shields
- Earplugs
- Clothing made of non-melting and non-conductive materials such as cotton
Even though it can be tempting to try to save time by skipping putting on PPE, it may be your last line of protection if an accident occurs.
2. Turn off the power
Before starting any electrical work, ensure the power is turned off at the main breaker or fuse box. Once turned off, you can mark it, tape it, or even lock it to ensure that no one turns it back on while you’re working. You can double-check that you have successfully turned off the power by using a multimeter or voltage detector to confirm the power is still off before beginning your work.
3. Use the right tools
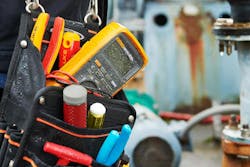
Every tool you use should have insulated handles designed specifically for electrical work (Photo 1). Insulated tools help safeguard against potential shock and electrocution. The most common tools you’ll need include wire screwdrivers, wire strippers, pliers, voltage testers, and multimeters. Any tool you use for electrical work should have the international symbol for 1,000V printed on it to show that it has passed safety standards.
Electrical test equipment should be rated for the category and voltage levels of the work environment. In addition, these tools should have clear symbols indicating proper safety testing has been completed. Always use the tools designed and tested for the work environment.
4. Inspect wires and cables
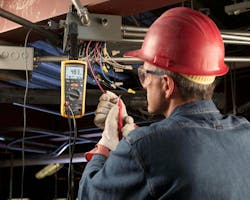
Visually inspect all wires and cables for any signs of wear, aging, or damage before installation. Insulation should be in perfect condition without cuts or other damage and should be uniform over the entire wire or cable. Discard any damaged wires or cables. An insulation tester can be used to identify current leaks from damaged wires (Photo 2).
5. Proper wire connections
When connecting wire, make sure all connections are secure and properly insulated. Connect smaller wires with a twist-on type connector and larger wires with terminal blocks. Both twist-on connectors and terminal blocks protect the exposed wires and ensure they maintain safe contact.
Ensure you’re using the correct twist-on connector or terminal block for your application. The twist-on connector should be appropriate for the gauge and number of wires you’re using. When selecting a terminal block, choose a block that is rated for the correct overall system voltage and current requirements.
6. Grounding
Ensure that all electrical systems are properly grounded. Grounding prevents electric shock, reduces fire risk, and helps protect the items connected to the circuit. Here’s how to test for grounding using a digital multimeter:
- Set your multimeter to the ohms or resistance mode.
- Plug the black lead into the COM terminal and plug the red lead into the ohms terminal.
- Turn off the power to the circuit you’re testing.
- Touch the black lead to a known earth ground, such as a grounding conductor in an electrical panel.
- Touch the red lead to the point you’re testing.
- The multimeter will display a resistance level. If the number is close to zero, this indicates good grounding. A high number can indicate poor or non-existent grounding.
- Disconnect the red lead first, then disconnect the black lead.
7. Follow local codes and regulations
Building codes layout requirements for electrical installation, including the required cables, circuits, and wire gauge for each application. Make sure your installation follows all local building codes and regulations, and, if necessary, obtain a permit before beginning work.
8. Double-check your work
Always double-check your work before turning the power back on. Make sure:
- All connections are secure and there are no loose wire strands.
- Wires are properly stripped and making solid contact.
- All terminal screws are tight.
- All wires are properly insulated.
- Everything is installed correctly.
You can also check for continuity of your electrical installation by using a multimeter. This will ensure the electrical circuit is complete before turning the power back on.
9. Repower and perform testing
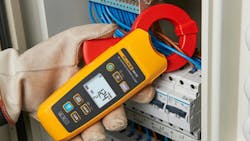
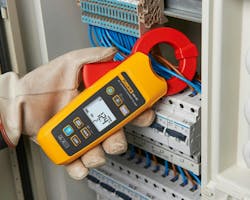
Once you’ve double-checked everything, turn the power back on at the main breaker or fuse box. Use a voltage tester or multimeter to verify that everything is wired correctly and that there are no electrical leaks. While a small amount of leakage is normal, too much leakage can cause system interruptions or fires and can prevent equipment from running correctly. In extreme cases, it can cause a rise in voltage on accessible conductive parts. To test leakage, use a leakage clamp meter capable of reading less than 0.1 mA (Photo 3). Measure your circuit with all loads disconnected.
Safety should always be the first consideration when doing any type of electrical work. Taking the time to perform proper testing before, during, and after installation, wearing PPE, and using the correct tools can protect lives, prevent accidents, and ensure the safety of everyone who uses the electrical installation.
About the Author
Michael Crepps
Michael Crepps, Fluke Application Specialist, joined Fluke in 2016 as a Technical Support Engineer. Michael has been providing support and training on electrical test and measurement tools for the past seven years. Prior to Fluke, Michael worked in the bio-tech industry providing technical expertise in manufacturing and development.


