A slipped drill or suddenly snapping bit can not only ruin your work, it can cause a painful injury.
- Don’t bring a knife to a gun fight. You’re going to need an industrial grade drill, not a consumer or pro-sumer one. Any veteran electrician can tell you which brands make such drills. For most tasks, it needs to be a ½-in. drive — not 3/8. With such a drill, You will produce better work faster with less fatigue and a lower chance of both dangerous bit-binding and overheating the motor or battery due to hard-duty usage.
- Use the correct bit. A general-purpose bit is not adequate for drilling into some materials. Not only will your work suffer, but you also run the risk of burning or snapping the bit. Ensure the bit is sharp. A dull bit is never safe to use. Don’t try to make up for dullness by applying more pressure. That increases the risk the bit will snap and fly at you.
- Lubricate if required. Depending on the type and thickness of the material, you may need a lubricant to keep the bit from becoming dangerously hot. It’s not that the bit will burn you; it’s that the hot bit can throw hot “swarf” (metal chips) at you or simply break.
- Clear the area. Before you start to drill, ensure you have removed slipping and tripping hazards.
- Protect around the drilling site. If you are drilling “in situ” (in the field rather than in a shop), you almost certainly need a dropcloth of some sort. You might need more than one if drilling an enclosure wall — one in side the enclosure to protect terminal strips and another outside the enclosure so you don’t have swarf all over the place.
- Secure your work. If you are drilling in a shop, make sure your work is properly clamped. Don’t use your free hand as a clamp, as you can subject it to damaging torque if the drill bit catches. If you are drilling in situ, ensure the wall of the box or whatever you are drilling isn’t going to flex enough to deflect the drill. Wooden blocks can often be used for this purpose.
- Properly route your power cord. If your drill requires AC power, plan where the cord will run between the power source and where you’ll be drilling. The last thing you need is for someone to trip over your cord and cause you to jerk back while that bit is spinning.
- Treat batteries as if they’re made of glass. Careful handling of batteries so they don’t suffer shock trauma (any sharp blow) is the single best way to prevent them from becoming an explosion hazard. Another thing you can do is store them correctly; that means in their designated toolbox slot instead of on the dashboard of your pickup truck where the sun will heat them right up.
- Check the battery before using it. Look for cracks, swelling, or other deformities. Also check that it’s not some knockoff brand. People who save money by putting generic ink cartridges in their inkjet printer end up needing to replace the expensive printhead. But people who use generic power tool batteries can lose far more due to the very real hazard of explosion or fire.
- Use a backstop. Drilling through a material into thin air will usually result in a jagged exit hole. Applying tape to both sides may suffice, but consider attaching a sacrificial board.
- Check your safety glasses. Make sure you can easily see through them before you attempt to bore with the drill. Don’t even consider using a drill without safety glasses.
- Drill a pilot hole, if necessary. As a general rule of thumb, if your hole requires a ¼ bit or larger, drill a pilot hole first. The idea is to give the shank of the larger bit some room. If you have to drill a particularly large hole and you’re not using a hole saw or step bit, you may need to drill a series of pilot holes. If you use an industrial grade step bit, this whole conundrum is solved (and you don’t even have to drill a pilot hole). Field electricians who frequently need to make holes in enclosures or equipment walls should have an industrial-quality step drill kit. As with the drills, the brand matters, and seasoned veterans know which brands to use.
- Drill correctly sized pilot holes for screws. If you’re drilling pilot holes for screws, the pilot hole should be about 80% the diameter of the screw.
- Apply the correct pressure. Don’t bear down hard as if you need to force the drill into the material. Let the bit do the cutting. You may need to momentarily retract the bit to clean the hole. As you get near the end (and you’re not drilling a blind hole), reduce the pressure so that you cut through, not burst through, to the other side.
- Run at the correct speed. Always start a hole slowly. This not only prevents drill skip (which damages work and creates a safety problem), but it also allows you to correct problems (such as poorly secured work pieces) while the drill torque is still low.
- No side-loading. A technique called “warbling” is a short cut way of making a hole larger. It results in a non-uniform hole, causes premature bearing wear, and presents a significant drill bit snap hazard. Never use this technique. Always drill with the tip — not the sides — of a drill bit.
- Debur holes. If you properly prepared the work surface, secured the material, used the correct bit, used the correct pressure, used a sacrificial board, and drilled straight, you likely do not have any burs — but you could still have a small bur or two. Several methods are available for bur removal. A rat tail file is one way to do it manually. With the drill, you can use an oversized bit and just make a shallow bore with it, but a better way is to use a chamfer bit.
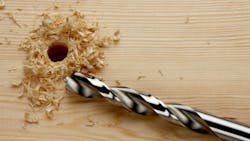
- Clean up when done. The main safety issue after boring is the sharf. Clean it up using an appropriate method. A brush and dustpan will usually do the trick, especially if you correctly prepared the area with a drop cloth or two. Never clean up using a blower or compressed air, unless your eyes (and the eyes of anyone nearby) are completely protected by goggles. It is especially a misuse of compressed air to blow the sharf off your clothing or your skin. Never point a compressed air nozzle at yourself or anyone else.
About the Author

Mark Lamendola
Mark is an expert in maintenance management, having racked up an impressive track record during his time working in the field. He also has extensive knowledge of, and practical expertise with, the National Electrical Code (NEC). Through his consulting business, he provides articles and training materials on electrical topics, specializing in making difficult subjects easy to understand and focusing on the practical aspects of electrical work.
Prior to starting his own business, Mark served as the Technical Editor on EC&M for six years, worked three years in nuclear maintenance, six years as a contract project engineer/project manager, three years as a systems engineer, and three years in plant maintenance management.
Mark earned an AAS degree from Rock Valley College, a BSEET from Columbia Pacific University, and an MBA from Lake Erie College. He’s also completed several related certifications over the years and even was formerly licensed as a Master Electrician. He is a Senior Member of the IEEE and past Chairman of the Kansas City Chapters of both the IEEE and the IEEE Computer Society. Mark also served as the program director for, a board member of, and webmaster of, the Midwest Chapter of the 7x24 Exchange. He has also held memberships with the following organizations: NETA, NFPA, International Association of Webmasters, and Institute of Certified Professional Managers.